


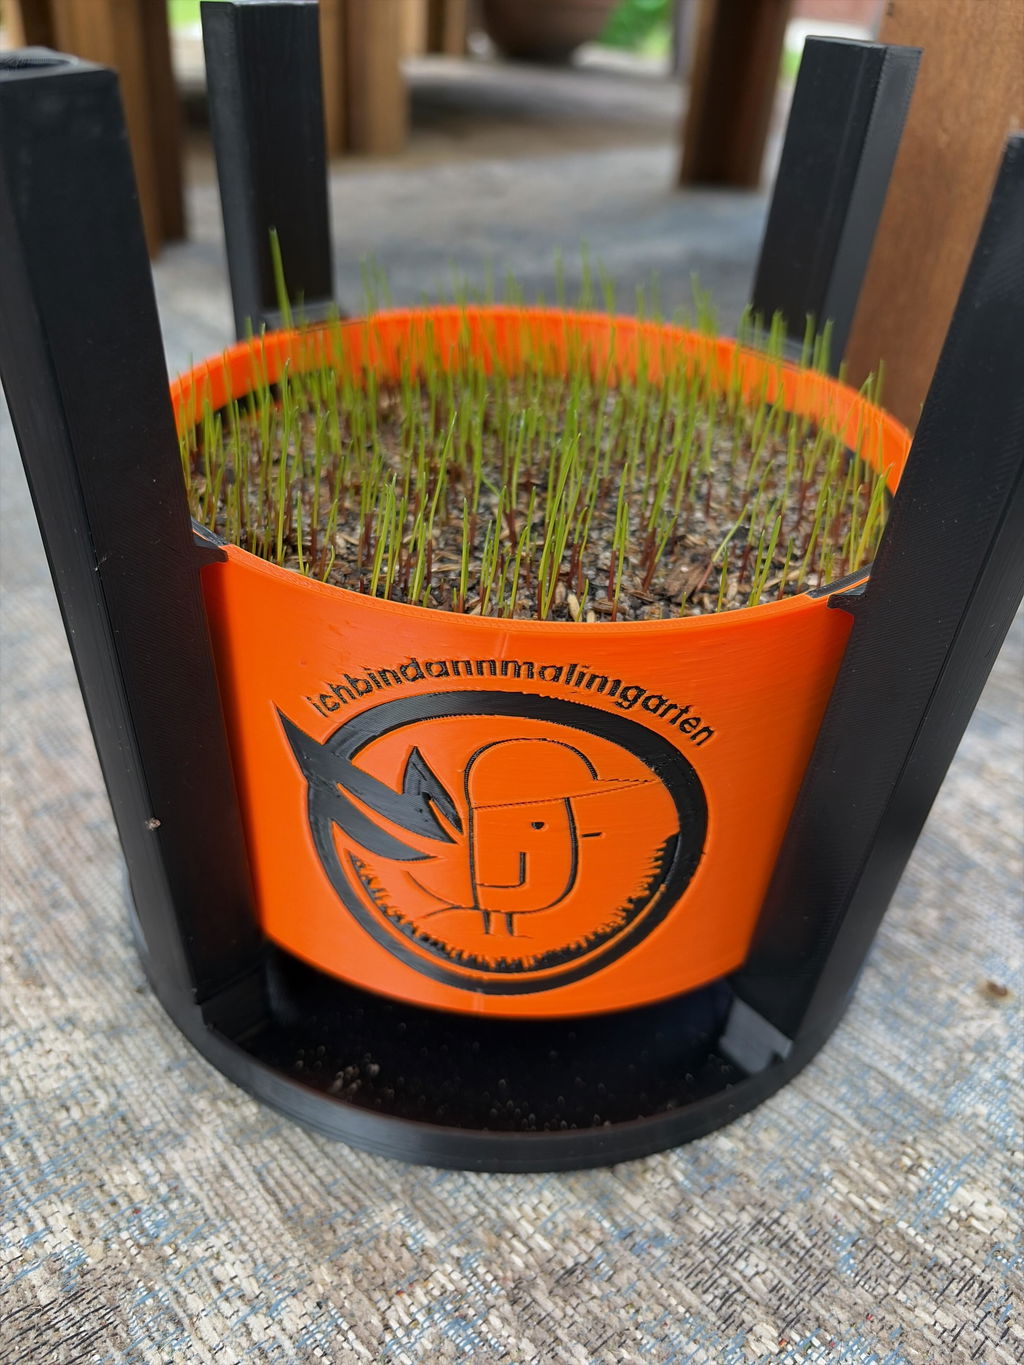
Turf Growing System – Modular Growing System for Turf Repair
More power. More precision. Your perfect lawn.
Processing time within one business day
incl. VAT.
FREE shipping from minimum order value


Compatibility
Technical data
Scope of delivery
What's Included (depending on the model selected)
- Sod growing box (quantity depends on selection)
- Shelf (number depending on selection)
- Compressors (number depending on selection)
- Stacking system column (quantity depends on selection)
- Coasters (quantity depends on selection)
Note: The exact contents of the package depend on the product variant you select. Any other items shown are for illustrative purposes only and are not included in the package.
Assembly
Installation Recommendations - Lawn Seeding System
Our assembly recommendations are intended as a general guide only.
Some recommendations are provided as examples—the color and shape of the parts may vary. However, the basic instructions remain valid.
Required tools, aids and protective equipment:
- No additional tools required
Assembly process:
- Positioning the columns: Position the columns of the stacking system at the four front markings on the turf-growing box.
- Top assembly: Hook the top of the column onto the designated mark.
- Installation (bottom): Press the bottom of the column down until it lies flat against the box. Repeat this process for all four columns.
Note: Hook it in at the top first, then press it down at the bottom—not the other way around. - Assembly: Place the box with the columns attached onto the base. Make sure the tabs and holes are aligned. Press down gently from above.
- Stacking: Place additional boxes with the columns already attached on top and stack them as desired. Ensure the stack is stable and level.

Usage
Application - Lawn Seeding System
Our application recommendations are intended as a general guide only.
Some recommendations are provided as examples—the color and shape of the parts may vary. However, the basic instructions remain valid.
Required tools, aids and protective equipment:
- Lawn substrate / soil-sand mixture in any ratio, as similar as possible to the existing soil.
Example: Topsoil + quartz sand with a grain size of 0.8–1.6 mm in a 70/30 ratio - Seeds similar to those of the existing lawn
- Water
Note:
- Markings for filling and compaction serve as a guide
- The actual compaction depends on the substrate and moisture content
Process:
- Insert the shelf: Place the shelf inside the grass-growing box.
- Fill with substrate: Evenly fill the box with the first layer of turf substrate up to the top of the first mark.
- Pre-compaction #1: Use the compactor to press the substrate down to the bottom edge of the first mark.
- Fill: Add another layer of substrate until it reaches the top edge of the second mark.
- Pre-compaction #2: Use the compactor to press the substrate down to the bottom edge of the second mark.
- Sowing: Spread the grass seed evenly over the prepared surface at the desired seeding rate, mimicking the existing lawn as closely as possible.
- Covering: Fill the box with growing medium up to the top edge to cover the seeds.
- Scrape off: Evenly remove any excess substrate.
- Final compaction: Gently press down on the surface to ensure that the grass seeds are firmly in contact with the soil.
- Watering: Moisten the potting mix evenly and not too heavily the first time, until water begins to drain out from the bottom.
- Positioning the columns: Position the columns of the stacking system at the four front markings on the turf-growing box. Hook the top of the column onto the designated marking.
- Installation (bottom): Press the bottom of the column down until it lies flat against the box. Repeat this process for all four columns.
Note: Hook it in at the top first, then press it down at the bottom—not the other way around. - Assembly: Place the box with the columns attached onto the base. Make sure the tabs and holes are aligned.
- Assembly:Press down gently from above.
- Stacking: Place additional boxes with the columns already attached on top and stack them as desired. Ensure the stack is stable and level.

Notes, warranty & liability

What our customers say


Top 👍🏻
👍🏻
👍🏻
👍🏻
👍🏻
👍🏻
Reviews from real lawn professionals


FITS PERFECTLY. EXCELLENT WORKMANSHIP. TOP-NOTCH CUT. ALMOST SILENT.

LAWN BUDDY
A CLEARLY VISIBLE DIFFERENCE IN THE CROSS-SECTION!

THE MOWING RESULTS ARE GREAT! AND THE SOUND OF THE MOWER IS MUCH NICE! 👍
FAQ - frequently asked questions
- Does 3D printing lead to an irregular surface?
The quality and appearance of the surface structure is an essential part of our product design.
Layer height:
Our layer heights are optimally selected to ensure a perfect balance between visual quality and mechanical strength.
High-resolution printing technologies:
Thanks to advanced printing processes, precise details and an even surface structure are created.
Quality guarantee:
Our zoomable product images give you a detailed view of the print look and illustrate the high-quality workmanship.
- Can the material withstand the load?
Our products have been carefully developed to remain durable and safe even under increased loads.
High-strength material:
We use UV and weather-resistant thermoplastics, which are particularly robust and durable.
Strength-optimized design:
The construction is specially designed to withstand mechanical loads and ensure reliable performance.
Extensive tests:
In contrast to many other manufacturers, our blade discs undergo long-term practical testing, a centrifugal force test to determine strength and an unbalance test - while the systems of others often remain untested.

