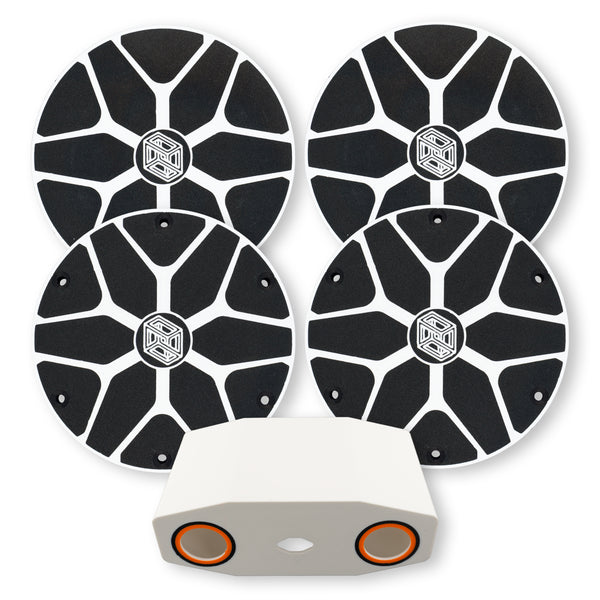


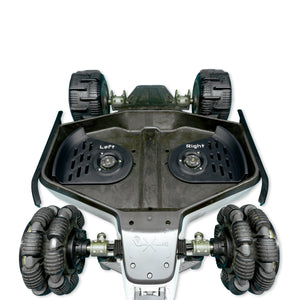
Mammotion Luba 1 AWD / 2 AWD robotic lawnmower performance styling set
More power. More precision. Your perfect lawn.
incl. VAT.
Free shipping from minimum order value
RECOMMENDED EXTENSIONS


Compatibility
Technical data
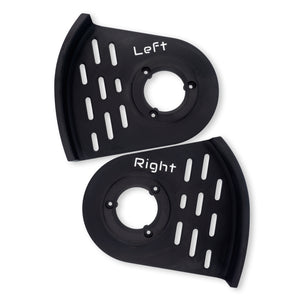
Scope of delivery


- 2x ready-to-use front wheel covers
- 2x ready-to-use rear wheel covers
- 1x ready-to-use angular camera protection
All other items shown are for illustrative purposes only and are not included in the scope of delivery.
Assembly
Mounting recommendation - camera protection (round/angular)
Our installation recommendations serve as a non-binding guide. If different, the manufacturer's specifications take precedence.
Required tools, aids and protective equipment:
- Small slotted screwdriver
Assembly process:
- Removing the original camera protection lever off the side
- Fixing: Attach the ZTTLPRINT camera protection and push it on until the nose clicks into place

Fitting recommendation - hubcap screw-on version
Our installation recommendations serve as a non-binding guide. If different, the manufacturer's specifications take precedence.
Front wheels
Required tools, aids and protective equipment:
- nothing
Assembly process:
- Positioning: Position the front wheel covers at an angle on the rim flange
- Fixation: Clip in with light pressure until it clicks into place

Rear wheels
Required tools, aids and protective equipment:
- 2.5mm hexagon socket as a wrench or bit for screwdrivers
- Small slotted screwdriver
Assembly procedure:
- Dismantling: Loosen 6x hexagon socket screws of the rear wheel covers per side
- Removing: Carefully lever off the wheel cover with the flat-blade screwdriver
- Positioning: Fit the ZTTLPRINT hub cap so that the screw holes match up
- Fixing: Replace 6x hexagon socket screws from step 1 and tighten evenly with a moderate torque (approx. 1Nm)

Fitting recommendation - hubcap plug-in variant
Our installation recommendations serve as a non-binding guide. If different, the manufacturer's specifications take precedence.
Front wheels
Required tools, aids and protective equipment:
- nothing
Assembly process:
- Positioning: Place the front wheel covers at an angle on the rim flange
- Fixation: Clip in with light pressure until it clicks into place

Rear wheels
Required tools, aids and protective equipment:
- Hot air dryer or hair dryer
- Small slotted screwdriver
Assembly procedure:
- Preparation for disassembly: Heat the outer ring carefully and evenly so that the retaining lugs come off more easily
- Removal: Carefully pry off the outer ring with a flat-blade screwdriver
Caution: The retaining lugs of the original ring may break off during removal! Damage cannot be covered. - Positioning: Fit the ZTTLPRINT hub cap so that the retaining lugs are aligned
- Fixation: Press on evenly all around and in the center

Notes, warranty & liability

What our customers say